If you want any effect explaining further, please feel free to comment on that post with your query. I will answer it to the best of my abilities. Do not worry, I check this fairly often and I think it emails me if anyone does comment.
|
Not all mentioned here are available, that's because they were rubbish, accidental clones or unfinished. Something to consider would be putting this in a header file (can shaders have headers?) and putting each effect in a separate file. Doesn't matter, you can copy and paste each effect yourself!
00 normal() - Normal Output (post processing only)
01 sineTransform - Trigonometric Transforms
02 asinTransform - Trigonometric Transforms
03 atanTransform - Trigonometric Transforms
04 sobel() - Sobel Edge-Detection
05 sobel2() - Minecraft's Sobel
06 luma() - Something Mojang Calls "Outline Water Colour" - Luma
07 notch() - The Notch filter, a type of pixelation, again, credit to Mojang
08 blurry_bloom() - Gaussian Blur
09 pixel() - Pixelation
10 mirror() - Mirror 1
11 jeNeSaisPas() - Axis Swap
12 AA() - 2x Anti-Aliasing, it looks terrible, thanks Mojang
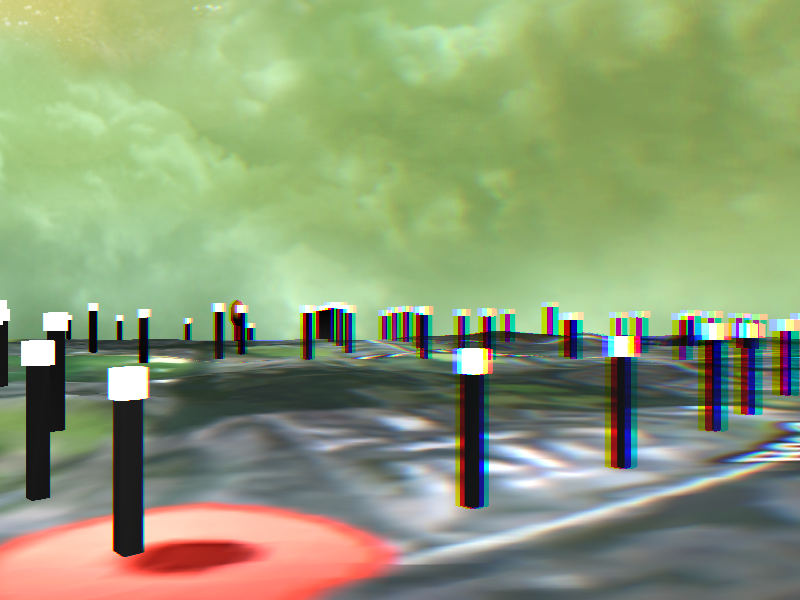
13 rnb() - Fake 3D
14 invert (vec4 input_colour) - Simple Inversion
15 convolve (vec4 input_colour) - Colour Convolve, another from Mojang
16 grey (vec4 input_colour) - Simple Greyscale
17 cel (vec4 input_colour) - A toon filter from R.B. Whitaker
18 contrast (vec4 input_colour) - Higher Contrast Filter
19 swap (vec4 input_colour) - Colour Swap Filter
20 rosso (vec4 input_colour) - Seeing Red
21 rouge (vec4 input_colour) - Lazy Greyscale
22 fl (vec4 input_colour) - Floor Filter
23 wacky (vec4 input_colour) - Wacky
24 brightnessFilter (vec4 input_colour) - Brightness - Makes it brighter not washed out (in theory)
25 disco (vec4 input_colour) - Position Colour
26 tri (vec4 input_colour) - 3 Colours
27 shades (vec4 input_colour) - 3 Shades
28 CRT (vec4 input_colour) - CRT - An attempt, I'm sure you can do better
29 col8 (vec4 input_colour) - 8 Colours - Like 3 Colours but with 5 more!
30 scan (vec4 input_colour) - Scan Lines
31 bloom4 (vec4 input_colour) - Bloom, 4th Attempt, it actually looks pretty good
32 wash (vec4 input_colour, vec4 wash_colour) - "Wash" Filter
33 blackEdgeToon (vec4 sobel_colour, vec4 cel_colour) - Black Edges Cartoon Filter
34 rob (vec4 input_colour, float grey_colour) - Red or Bust
35 remainder (vec4 input_colour, float avg) - "Remainder" Filter
36 chess (vec4 interlaceColour) - Chess Board - Interlace Stuff!
//forgot to mention, I actually mirror the base colour in this too
- dith (vec4 input_colour)
- truCRT (vec4 input_colour)
- bloom (vec4 input_colour)
- bloom3 (vec4 input_colour)
? depth_of_field (float focal_distance, float focal_range, vec4 input_colour)
- rs (float grey_colour)
? motionBlur()
I use visual studio. For the longest time I used basic C++ syntax highlighting on all of my shader files. After some time I grew tired of this - it wasn't enough, so I did some Googling. I came across this helpful page: msdn.microsoft.com/en-us/library/zy61y8b8%28VS.80%29.aspx?f=255&MSPPError=-2147217396 and so I looked up the documentation, found all the keywords and compiled them into the required file, which you can download here: www.mediafire.com/download/yq1swai5obah84v/usertype.dat
I may have added too many words, some local variables that didn't need to be added like shininess or position, but that's the beauty of it, you can customise the file to your own work, add and remove variables. It's just a plain text file. If you don't use VS, well, now you've got a massive list of keywords that you can adapt to use in whichever editor you use. I did include some deprecated keywords just in case you're using an older version, I also included some keywords that are going to be reserved in future versions for a bit of future proofing. It's all just a suggestion and not the rules. Makes it look a lot prettier though.  Of course these filters are meant to be combined, but here's what they look like when applied to the original image. They are in order, this is connected to the numbers in the next post. (Somehow the ordering is going weird so may be previous and not next)
// Much more efficient than the real thing, it also won't work with the glasses
// greComp = green compensation

vec4 rnb()
{
    vec4 redSide = texture(tex, vec2(tex_coord.x * 0.99, tex_coord.y));
    redSide.g = 0.0;
    redSide.b = 0.0;
    redSide.w = 0.333;
    vec4 bluSide = texture(tex, vec2(tex_coord.x / 0.99, tex_coord.y));
    bluSide.r = 0.0;
    bluSide.g = 0.0;
    bluSide.w = 0.333;
    vec4 greComp = texture(tex, vec2(tex_coord.x, tex_coord.y));
    greComp.r = 0.0;
    greComp.b = 0.0;
    greComp.w = 0.333;
    return redSide + bluSide + greComp;
}
Version 2. This may actually work. Uses green and magenta instead of red and blue. Does not use a compensation colour. May actually work as even though the distance between the green and the magenta layers is the same throughout the image, relatively, it is greater for objects further away. Unfortunately the colours may not come out correctly.
vec4 fake3Dv2()
{
        vec4 col1 = texture(tex, vec2(tex_coord.x - 0.005, tex_coord.y));
        col1 = vec4(0.0, col1.g, 0.0, 0.5);
        vec4 col2 = texture(tex, vec2(tex_coord.x + 0.005, tex_coord.y));
        col2 = vec4(col2.r, 0.0, col2.r, 0.5);
        return col1 + col2;
}
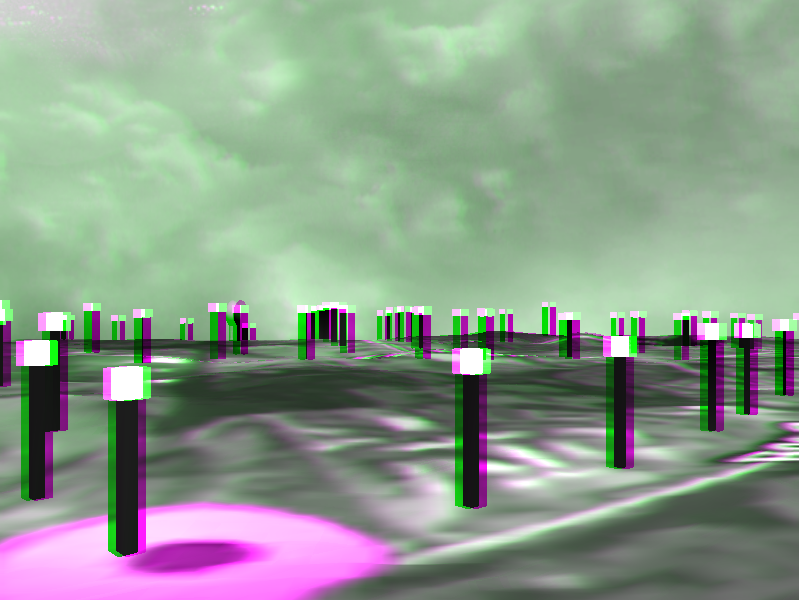
There was a type-o in the previous bit but I quite like the effect so I'll leave it in. It was supposed to be:
col2 = vec4(col2.r, 0.0, col2.b, 0.5); |
AuthorHi there, the name's Matthew Jenkinson and I'm currently working at Firesprite. In my spare time I work on programming projects like you see here. Archives
March 2021
Categories
Fake 3D Version 2.
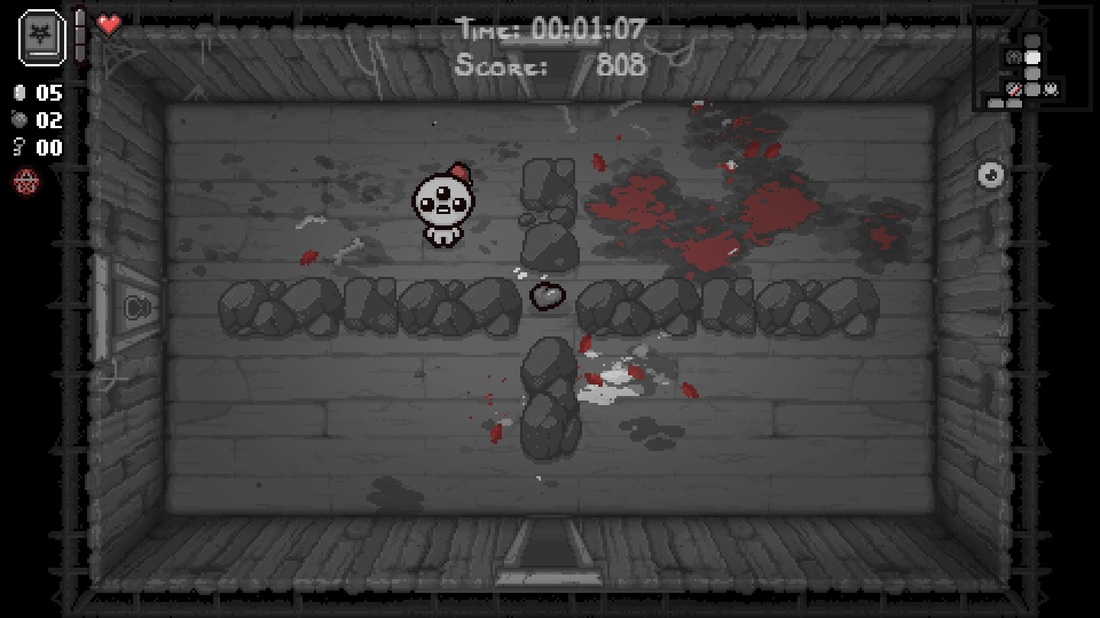
A variant of Red or Bust applied to The Binding of Isaac: Rebirth.
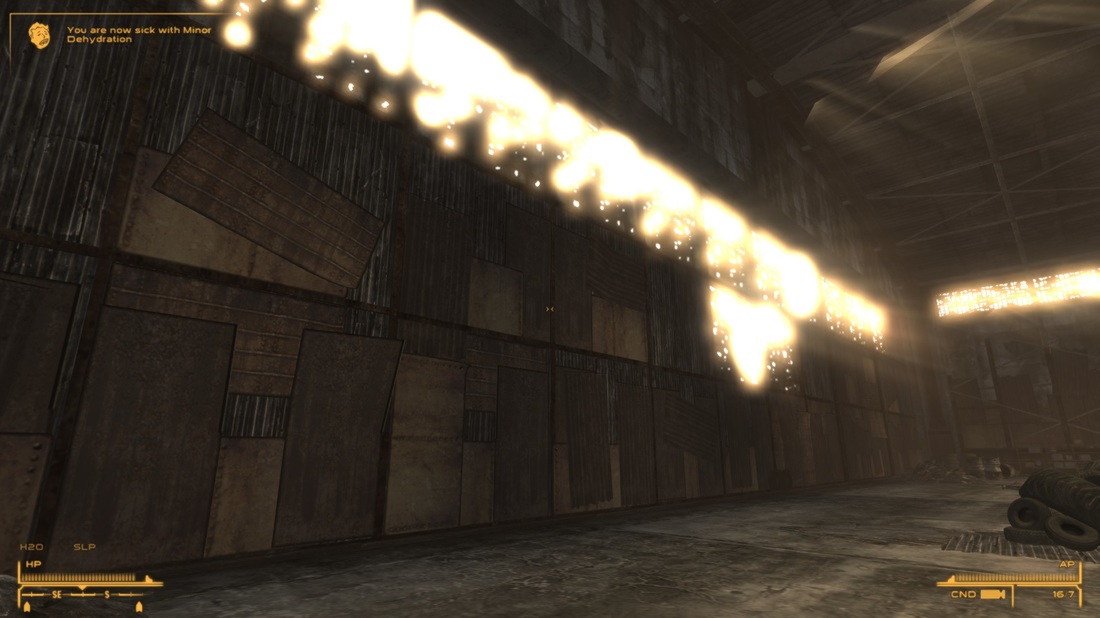
Bloom effect applied to Fallout New Vegas, thanks to SweetFX by CeeJay for the dll injection that makes it possible to put my filters into other games.
Links to each effect in order:

|
 RSS Feed
